The Cost-Effectiveness Opportunities of Video-Based Lessons

The Cost-Effectiveness Opportunities of Video-Based Lessons

Video-based lessons are rapidly taking over in educational settings in the current digital era. This movement is a deliberate change that offers several economic advantages for instructors and schools, and it’s not just about convenience.

  • Scalability and Accessibility: The ability to reach a significantly larger audience is one of the main benefits of video-based lessons. An infinite number of learners can receive a video lesson once it has been produced. This reduces the need for live instruction or physical classrooms, which lowers expenses for travel, classroom leases, and teacher pay. Additionally, these sessions are accessible to students at any time and from any location, increasing the flexibility of learning. Because they can learn at their own speed, they don’t require as much expensive one-on-one coaching or additional assistance.
  • Time and Resource Efficiency: The fact that video-based classes save time, and money is another significant benefit. Making and presenting video classes can be more effective than traditional classroom instruction. Teachers can save time by reusing and repurposing content. Additionally, schools can save money on overhead expenses like supplies, utilities, and upkeep because physical classrooms are no longer necessary.
  • Improved Engagement and Retention: Compared to traditional approaches, video-based lessons frequently provide a deeper learning experience. Videos can enhance learning through the use of animations, images, and interactive components. Research indicates that when knowledge is presented visually, students are more likely to pay attention and retain it. Better academic outcomes and a decreased need for remedial teaching may arise from this.
  • Cost-Effective Production: The wonderful thing about making video-based classes now is that technology has significantly decreased in cost. Schools and individuals can now create high-quality material without going over budget thanks to the increased accessibility of video production equipment and software. It’s even more affordable because there are a ton of free and open-source tools for distribution, animation, and editing.

Empowering educators and students with AutoAuto

AutoAuto stands out as a leader in video-based STEM education. Offering a comprehensive platform, AutoAuto provides everything needed to create impactful video lessons and empower students to explore the exciting world of Science, Technology, Engineering, and Mathematics (STEM).

  • A Curriculum Tailored to All Levels: AutoAuto caters to a wide range of learning needs, offering courses suitable for students from elementary (3rd grade) all the way through college/university. This ensures that educators can find the perfect program to match their students’ age and skill level.
  • Learning by Doing: AutoAuto goes beyond traditional video lectures by incorporating a project-based approach. Students master crucial skills like Python programming and Artificial Intelligence concepts by actively learning through hands-on projects.
  • Two Learning Options: AutoAuto caters to both in-person and remote learning environments. Students can choose to utilize the hands-on AutoAuto cars (physical robots) or explore the concepts through the simulated version – a virtual car accessible to every student. This flexibility ensures adaptability and inclusivity.
  • Engaging and Efficient for Educators: AutoAuto features a wealth of resources for educators, including video-based lessons, auto-graded challenges for student assessment, and a teacher’s portal to track progress and monitor learning outcomes. Additionally, AutoAuto offers free remote professional development sessions twice a year, ensuring educators are well-equipped to utilize the platform’s full potential.
  • Beyond the Technology: AutoAuto provides more than just software. The platform also boasts a comprehensive curriculum available in English, Spanish, and Portuguese, further demonstrating their commitment to global accessibility.
  • Cost-Effective Choice: While the pricing information isn’t readily available on the website, the platform emphasizes its affordability by offering competitive plans and highlighting the benefits of video-based learning as a cost-effective educational approach.

Video-based lessons offer a clever and economical method of delivering instructional content. By leveraging the power of technology, schools and instructors can create engaging, memorable, and effective learning experiences for students of all ages, all while controlling costs. From scalability to improved engagement and versatility, the benefits of video-based lessons make them an ideal choice for modern education. As the demand for flexible and accessible learning continues to grow, video-based lessons are set to play an even bigger role in the future of education.

Contact us

Fill in your details below or send us an email on info@knowledge-hub.com

Enhancing Skills in Coding and Robotics with Prototyping using the LEGO® Education SPIKE™ Prime Set

Enhancing Skills in Coding and Robotics with Prototyping using the LEGO® Education SPIKE™ Prime Set

Coding and robotics are essential skills in every aspect of life. They help us understand technology better and even inspire creativity. One fantastic way to learn these skills is through the LEGO® Education SPIKE™ Prime Set. This set not only makes coding fun but also emphasizes the importance of making prototypes and testing them. Let’s explore why these steps are crucial in the learning process.

What are Prototypes?

A prototype is a basic product that is made to test concepts. Consider it an initial draft. Prototypes in engineering and coding allow us to understand how our ideas function in the real world, much like in writing where you may go through multiple versions before settling on the final version. You may swiftly construct a model, be it a vehicle, robot, or other device, using LEGO® SPIKETM Prime.

Why Make Prototypes?

  • Visualization of Ideas: Building a prototype allows you to visualize your concept. Instead of just thinking about it, you can see how it looks and works. This is especially important in coding, where abstract concepts can be hard to grasp. Seeing your idea in action helps solidify your understanding.
  • Problem Solving: Prototyping encourages problem-solving. When you create a model, you might encounter challenges. Perhaps a robot doesn’t move as you expected, or it doesn’t follow a path correctly. These problems provide valuable learning opportunities. You learn to troubleshoot and find solutions, which is an essential skill in coding and robotics.
  • Iterative Learning: Prototyping promotes an iterative learning process. After testing your prototype, you can refine it based on what you’ve learned. To boost performance, you may modify the design or your code. This cycle of making, testing, and refining is at the heart of both engineering and coding. It teaches you to embrace mistakes as part of the learning journey.

The Role of Testing

Once you have your prototype ready, the next sequential step is testing it. Testing allows you to see whether your design performs as anticipated. Here’s why testing is so important:

  • Validating Ideas: Testing allows you to validate your concepts. Did the robot perform the task as expected? Did the code execute without errors? This feedback helps you determine if you’re on the right track or if changes are needed.
  • Identifying Weaknesses: During testing, you might find weaknesses in your prototype. Maybe the robot struggles to navigate certain obstacles, or a piece doesn’t fit well. Identifying these weaknesses early on can save time and resources in the long run. It’s better to catch problems now than to discover them later in a more advanced project.
  • Encouraging Creativity: Testing can spark new ideas. As you observe how your prototype performs, you may think of innovative ways to enhance it. Perhaps you could add new features or change the design entirely. This process encourages creative thinking, which is essential in both coding and robotics.
  • Building Confidence: Successfully testing your prototype builds confidence. Each small victory, like getting a robot to complete a task or a program to run smoothly, reinforces your skills. This confidence encourages you to take on more demanding projects in the future.

Learning Through Failure

Learning from failure is one of the most crucial lessons in testing and prototyping. It’s acceptable that not every prototype will function flawlessly the first time! Actually, mistakes can teach us some of the most valuable lessons. Every obstacle you face helps you become a better coder and designer by teaching you something new.

To sum up, learning coding and robotics requires building and testing prototypes, especially with interactive resources like the LEGO® Education SPIKETM Prime Set. Iterative learning, problem-solving, and concept visualization are all aided by prototyping. Testing enables you to find flaws in your ideas, get them validated, and stimulate your creativity. When combined, these procedures promote an inquisitive and resilient mindset. Remember that every prototype you create is a step toward developing new abilities and realizing your objectives. Most schools in Dubai and other Middle East regions opt for the LEGO® Education SPIKE™ Prime Set. So, get to work building, and cherish the educational experience!

Contact us

Fill in your details below or send us an email on info@knowledge-hub.com

Improved Online Enrollment Systems Enhance School’s Safety Standards

Improved Online Enrollment Systems Enhance School’s Safety Standards

In today’s educational setting, student safety and sensitive data protection are more important than ever. Online enrolment systems are an excellent solution to support these safety criteria. Schools can considerably improve their security measures by implementing a paperless method. We’ve answered some common queries regarding how online enrolment can benefit institutions.

Q: Can online student enrollment help securely collect medical records?

A: When student enrollment happens online, their medical information can be securely transferred to the school’s system. Unlike paper forms, which can be lost or misused, digital records are kept in a secure environment with restricted access. This implies that only authorized people, such as school nurses and administrators, can access sensitive health information.

Q: How does online enrollment ensure proper contact information is collected?

A: Accurate contact information is essential for effective communication between schools and families, particularly during an emergency. Online enrolment systems frequently require parents to verify their contact information, minimizing the likelihood of errors. Furthermore, these systems support real-time updates, so if a parent changes their phone number or address, they can update the information quickly. This guarantees that schools get the most recent data. 

Q: Is it possible to strengthen student data security through online enrollment?

A: Online enrolment improves data security in multiple ways. First, it reduces the physical handling of important papers, lowering the danger of loss or theft. Also, credible online enrolment platforms like ‘Schoology’ have cybersecurity features like encryption and two-factor authentication to protect data during transmission and storage. This means that even if someone tries to access the system, they will fail at doing so.

Q: Can schools eliminate administrative errors?

A:  The answer is yes! Online enrolment systems reduce errors by utilizing standardized fields and dropdown menus that direct parents to enter accurate information. Furthermore, many online systems automatically evaluate the data submitted (for example, ensuring that a phone number has the correct amount of digits), lowering the possibility of administrative errors. This means that when school workers access the data, they may be confident that it is accurate and full. 

Q: How can online enrolment increase communication with parents?

A: Online enrolment services, such as Schoology, enable automated email confirmations and reminders to keep parents informed about their enrolment status and any extra requirements. Furthermore, having all data in a single digital system helps school staff to easily retrieve and reference information, improving communication efficiency. For example, if parents need to be reached about an incident that happened to their child, staff can immediately reach out to them. 

Q: Why Choose Schoology for Online Enrollment?

A: Schools are rapidly recognising the benefits of online enrolment, making tools like Schoology important. Schoology provides a comprehensive learning management system that smoothly interacts with enrolment processes, making it easy to manage student data securely. Schools in Dubai can use Schoology to link enrolment information to students’ learning profiles, providing educators with the data they need from the start.

Online enrolment streamlines administration, increases safety and improves communication. Schools may safely collect medical records, ensure accurate contact information, improve data security, and minimize errors, resulting in a safer and more efficient environment for everyone.

Contact us

Fill in your details below or send us an email on info@knowledge-hub.com

Useful Presentation Skills for Students Using Google Slides

Useful Presentation Skills for Students Using Google Slides

Ever wondered how to create awesome presentations like those you see in offices? Well, Google Slides is the perfect tool to start your journey! It’s a popular choice among students who need to complete school projects and impress their teachers. But if you’re just getting started, we are here to guide you. Read the Blog to understand some quick tips and tricks to help you make the most out of Google Slides, imbibing presentation skills for students.

Q1: What is Google Slides, and why should I use it?

A1: Just like a PowerPoint presentation helps you design amazing pitches, present research information, and share thought-provoking ideas, Google Slides does the same, and it’s free! This is essentially a cloud-based platform that allows for edits & collaboration, to anyone who has an internet connection.

  • Multiple contributors can work on the same presentation at the same time.
  • No need to worry about losing your edits, as everything gets auto saved.
  • All your files are neatly stored and easily shared on Google Drive.
  • Make presentations from any device – laptop, phone, iPad, etc.

Q2: How do I create a new presentation in Google Slides?

A2: Making a new presentation in Google Slides is simple.

  1. Go to Google Slides.
  2. Choose the “Blank” option from the menu or opt for a template.
  3. A new presentation will open, and you can start adding content to your slides right away.

Pro tip: Presentation skills for students can be refined by choosing Google’s pre-made templates, which include pre-set layouts and designs, to get a head start.

Q3: How can I customize the design of my slides?

A3: Google Slides gives you a lot of flexibility to personalize your slides:

  • Themes: Google Slides offers a variety of themes that change the font, and color scheme of your entire presentation.
  • Backgrounds: You can add colors or even upload images as your slide background by selecting the relevant function.
  • Layouts: Don’t feel like starting from scratch? Use Google Slides’ pre-built layouts to quickly organize your text, images, and charts.
  • Whether you prefer a clean, professional style or a bright, creative vibe, you can change these aspects to make your presentation stand out.

Q4: How do I add text, images, and videos to my slides?

A4: Adding content is straightforward:

  • Text: Make things easy by clicking on the ‘text box’ icon in the toolbar, or choose a layout with a text box already included.
  • Images: Go to the Insert option and Click → “Image.” You can customize your slides by uploading images from your repository, or the ones that are saved on Google Drive.
  • Videos: The steps include clicking on “Insert” → “Video,” and then you can add YouTube videos or upload your own.

Each element can be resized, moved around, and formatted to fit your presentation’s style.

Q5: What’s the best way to collaborate with classmates using Google Slides?

A5: As the saying goes, alone we can do little, together we can do so much. Similarly, collaboration on project work results in a win-win situation. Here’s how you can work with your classmates and develop efficient presentation skills for students.

  • Click the “Share” button at the top-right corner of your presentation.
  • Enter your classmates’ email addresses.
  • Choose their permission level: “View,” “Comment,” or “Edit.”
  • Everyone invited can access the same document simultaneously.

You can all view each other’s modifications in real-time, which is quite cool. By tagging someone in a comment, you may also assign jobs and leave comments (simply type @ followed by their name or email).

Q6: How do I present my Google Slides to the class?

A6: Presenting is easy if your slides are prepared. Simply select “Present” from the menu in the upper-right corner.

  • Q&A: Google Slides offers a really useful Q&A section. You can initiate an online Q&A session where members of your audience can submit questions when you select “Presenter View.”
  • Presenter View: With this setting, your audience will only view the current slide while you can see your speaker notes and future slides.

Q7: Can I use Google Slides when offline?

A7: Certainly! Google Slides is an online application, but you can make it work offline too.

  • Use Chrome to open Google Slides.
  • On the upper left, click the three-line menu.
  • From the “Settings” sub-tab you can click on “Offline” mode.

You can now work on your presentation offline without using the internet. As soon as you decide to go online, all the prior changes and current changes will automatically sync.

Q8: How do I export or share my finished presentation?

A8: After you’ve finished your masterpiece, there are various methods you can download or share it:

  • By selecting “Share,” you will receive an open-access URL. Permissions for viewing, commenting, and editing can be specified.
  • Download: Select your presentation as a PowerPoint (.pptx), PDF, or even a picture by going to “File” → “Download.”
  • If you have a dedicated school blog or school website, you can embed your presentation directly by selecting “File” → “Publish to the web.”

Empowering Students with TechnoEarth and Google Slides

TechnoEarth teaches students how to use Google Slides to make powerful presentations, which helps kids become environmental stewards. By using rotating slide decks and interactive infographics, students may effectively communicate important environmental issues. By integrating vital digital tools like Docs, Sheets, and My Maps, the initiative makes it possible for students to present their research at gatherings like Earth Keeper’s Conferences.

Presentation skills for students is an invaluable skill. Google Slides is indeed a fantastic tool for making visually stunning presentations, but it also fosters creativity and teamwork. You can easily build, modify, and present your Google Slides projects with confidence if you follow these recommendations!

Contact us

Fill in your details below or send us an email on info@knowledge-hub.com

Announcing Digital Storytelling with MatataStudio

Announcing Digital Storytelling with MatataStudio

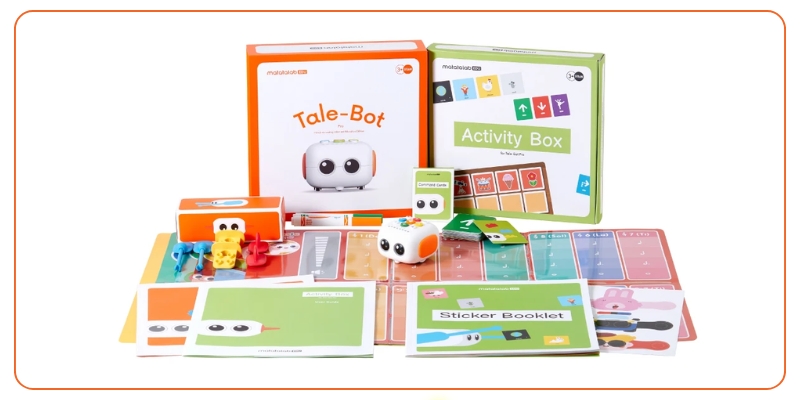
Digital storytelling is a modern way for children to express their creativity by combining narratives with technology. Through coding, kids can bring their stories to life by creating interactive animations, games, and life lessons. With tools like MatataStudio and MatataBot, students are exposed to STEM learning methodologies in a fun and hands-on way. Continue reading the Blog to explore how MatataStudio helps children use coding to develop different plots and scenes that culminate into an interesting tale.

What is Digital Storytelling?

Digital storytelling involves using digital tools. Unlike traditional methods, where a story is told through words or pictures, digital storytelling can be conceptualized from scratch – using coding techniques.

How MatataStudio Enables Digital Storytelling

MatataStudio, paired with the friendly MatataBot, provides a playful way for young children to learn the basics of coding while creating their own stories. Designed for little learners – as young as kindergarten age, MatataStudio uses physical Coding Blocks that allow them to program MatataBot. By arranging the blocks, children can control how MatataBot moves, reacts, and interacts, making it a perfect tool for curating digital stories.


Crafting Ideas with MatataBot

  • Imagine a child who wants to tell a story about a journey through a Magical Forest. Using MatataStudio, they can program MatataBot to act as the main character of the story. The child can place coding blocks that direct MatataBot to move forward, turn, or interact with objects on the play mat. For example:
  • Action Blocks: Use these to make MatataBot move through different destinations within the story setting; like crossing a bridge or exploring a cave.
  • Music and Sound Blocks: Adding sounds to different parts of the journey makes the story more immersive. MatataBot can play cheerful tunes when finding treasure or spooky sounds when entering a dark area.
  • Loop and Repeat Commands: Children can create recurring actions in their story like MatataBot repeatedly searching for hidden keys or dancing when it completes a quest.
  • This hands-on way of telling stories lets children use their imagination to guide the plot, make decisions, and create different endings. They learn to think step-by-step as they plan the actions of their character and see how those actions play out.

Examples of Digital Storytelling with MatataStudio

  • The Adventure of MatataBot in Space: Create a space adventure story where MatataBot becomes an astronaut exploring new planets. Using the coding blocks, they can make MatataBot move around the play mat, collect “alien samples,” and play sounds when discovering a new planet. Through this process, kids learn to structure their stories, use coding to program different actions, and add fun elements like sound effects.
  • MatataBot and the Hidden Treasure: In this example, children can tell a story where MatataBot is a treasure hunter searching for a hidden gem on a desert island. By programming the robot to move in specific patterns, avoid “traps,” and unlock “hidden doors,” they practice problem-solving skills and learn how to sequence actions logically. The coding blocks allow kids to introduce elements like loops, making MatataBot search for clues repeatedly until it finds the treasure.
  • The Animal Rescue Story: Children can use MatataBot to tell a story about helping animals find their way home. By coding MatataBot to navigate through different obstacles, children can design paths that lead to each animal. This encourages empathy and creativity, as kids can come up with unique ways to guide the robot while understanding the basics of coding.

Benefits of Digital Storytelling with MatataStudio

  • Develops Logical Thinking: Writing code to create a digital story teaches children to think logically. They must decide which coding blocks to use, in what order, and how each action will affect the overall narrative. This process helps them understand cause and effect, sequence, and logical problem-solving.
  • Promotes Communication: When children work together to create a story, they learn to communicate their ideas, listen to others, and collaborate to solve problems. It becomes a fun team-building activity where kids learn to share and build on each other’s creativity.
  • Encourages Experimentation: One of the best parts of coding with MatataStudio is that it allows children to experiment freely. They can try out different story ideas, change the actions of MatataBot, and see what works best. This trial-and-error approach helps them learn from their mistakes and feel more confident about experimenting with new ideas.

MatataStudio and MatataBot open up a world of possibilities for children to explore digital storytelling through coding. By combining the logic of programming with the creativity of storytelling, children can create interactive stories that are fun, educational, and highly engaging.

Contact us

Fill in your details below or send us an email on info@knowledge-hub.com

Introducing Interactive Learning with the LEGO® Education Coding Express Set

Introducing Interactive Learning with the LEGO® Education Coding Express Set

Welcome to the world of Coding Express, a fun and engaging way for Pre-K and Kindergarten students to explore important concepts like traffic rules and problem-solving. Using interactive learning & play, the Coding Express set, notably in Lesson 7 titled Journey: Trouble on the Road, teaches young learners the fundamentals of coding ideas and helps them comprehend how “traffic signs” operate. In addition to having fun designing tracks, the main goal of this lesson is to teach kids the value of traffic signs and regulations in assisting with potential roadside issues.

This interactive learning unit is designed for students aged 4-6 and typically lasts 30-45 minutes. It is an advanced lesson but is easily adaptable based on the needs of your students. The Coding Express app is key to making this lesson dynamic, but an unplugged version can also be used if you prefer to skip the technology aspect.

Engage – Introducing Traffic Rules

Introduce the lesson by having a discussion about driving rules with the students. Ask open-ended questions such as:

  • Do you know any traffic rules? What are they?
  • Why is it necessary to follow traffic rules?

This conversation will help the students start thinking about the importance of following rules and how traffic signs help us stay safe on the road. Then, introduce the idea that traffic signs are visual reminders of these rules, guiding drivers to avoid danger and make the roads safer for everyone.

For added fun, turn the classroom into a mini driving arena! Using the four traffic signs included in the Coding Express set (stop, animal ahead, construction work ahead, & railway crossing), have students guess what each sign means. You can place the signs around the classroom and ask the students to pretend they’re driving high-speed trains. When they approach a sign, they must ‘slow down’ or ‘stop’ based on the rules they’ve just learned. This playful activity gets them moving and thinking about how traffic signs function.

Building and Problem-Solving with LEGO® Education 

Now it’s time for the students to get hands-on with interactive learning! In this phase, students will form small groups to build a Y-shaped track using the Coding Express set by LEGO® Education. Once the track is built, they can place their models, representing buildings or stations, around the track. This adds a layer of imagination and storytelling to the lesson, as students start envisioning a real-world journey.

Randomly place action bricks along the track. These bricks introduce specific actions or problems for the train, such as stopping, changing direction, or slowing down. Using the Coding Express app by LEGO® Education, students will take turns driving their train on the track, using different buttons to see what happens when the train passes each action brick.

This part of the lesson encourages experimentation. As students explore the various functions of the app, they will encounter problems like traffic jams or wrong turns, giving them the opportunity to solve these issues using traffic signs they’ve already learned about.

Finding Solutions

Now that the students have seen how their trains move and respond to different situations, it’s time to reflect on what they’ve learned. Engage into a discussion by asking:

  • What happened when the train passed each action brick?
  • Which traffic sign would help solve the problem you faced?

Encourage the students to think critically about the scenarios they’ve encountered during the interactive learning phase. This step helps solidify the connection between traffic signs and solving real-life traffic problems.

Elaborate – Creating and Playing with Traffic Signs

Invite them to invent their own traffic signs or models, imagining new ways to keep drivers safe. These creations can be placed around the track, and students can explain why they made each sign and how it contributes to road safety.

This is also an opportunity to discuss other traffic safety measures. Ask questions like:

  • Can you think of any other important things to keep in mind when driving?
  • What are other ways people stay safe on the road?

Evaluate – Observing Student Progress

The final phase is all about evaluation. As students work through the lesson, teachers can observe their progress using an observation checklist:

  • Did the students successfully create the Y-shaped track?
  • Were they able to describe the journey their train took?
  • Did they demonstrate an understanding of the sequence of events on their trip?

Encourage students to explain their thinking and decision-making processes throughout the interactive learning activity. This gives insight into their understanding of traffic signs, road safety, and basic coding concepts.

Contact us

Fill in your details below or send us an email on info@knowledge-hub.com