Announcing Digital Storytelling with MatataStudio

Announcing Digital Storytelling with MatataStudio

Digital storytelling is a modern way for children to express their creativity by combining narratives with technology. Through coding, kids can bring their stories to life by creating interactive animations, games, and life lessons. With tools like MatataStudio and MatataBot, students are exposed to STEM learning methodologies in a fun and hands-on way. Continue reading the Blog to explore how MatataStudio helps children use coding to develop different plots and scenes that culminate into an interesting tale.

What is Digital Storytelling?

Digital storytelling involves using digital tools. Unlike traditional methods, where a story is told through words or pictures, digital storytelling can be conceptualized from scratch – using coding techniques.

How MatataStudio Enables Digital Storytelling

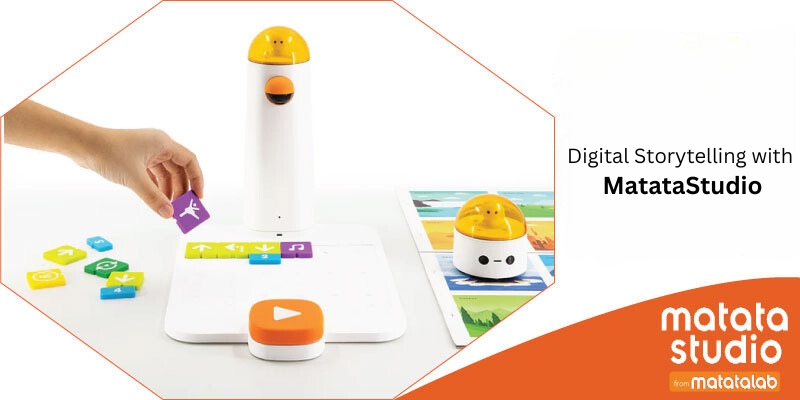
MatataStudio, paired with the friendly MatataBot, provides a playful way for young children to learn the basics of coding while creating their own stories. Designed for little learners – as young as kindergarten age, MatataStudio uses physical Coding Blocks that allow them to program MatataBot. By arranging the blocks, children can control how MatataBot moves, reacts, and interacts, making it a perfect tool for curating digital stories.


Crafting Ideas with MatataBot

  • Imagine a child who wants to tell a story about a journey through a Magical Forest. Using MatataStudio, they can program MatataBot to act as the main character of the story. The child can place coding blocks that direct MatataBot to move forward, turn, or interact with objects on the play mat. For example:
  • Action Blocks: Use these to make MatataBot move through different destinations within the story setting; like crossing a bridge or exploring a cave.
  • Music and Sound Blocks: Adding sounds to different parts of the journey makes the story more immersive. MatataBot can play cheerful tunes when finding treasure or spooky sounds when entering a dark area.
  • Loop and Repeat Commands: Children can create recurring actions in their story like MatataBot repeatedly searching for hidden keys or dancing when it completes a quest.
  • This hands-on way of telling stories lets children use their imagination to guide the plot, make decisions, and create different endings. They learn to think step-by-step as they plan the actions of their character and see how those actions play out.

Examples of Digital Storytelling with MatataStudio

  • The Adventure of MatataBot in Space: Create a space adventure story where MatataBot becomes an astronaut exploring new planets. Using the coding blocks, they can make MatataBot move around the play mat, collect “alien samples,” and play sounds when discovering a new planet. Through this process, kids learn to structure their stories, use coding to program different actions, and add fun elements like sound effects.
  • MatataBot and the Hidden Treasure: In this example, children can tell a story where MatataBot is a treasure hunter searching for a hidden gem on a desert island. By programming the robot to move in specific patterns, avoid “traps,” and unlock “hidden doors,” they practice problem-solving skills and learn how to sequence actions logically. The coding blocks allow kids to introduce elements like loops, making MatataBot search for clues repeatedly until it finds the treasure.
  • The Animal Rescue Story: Children can use MatataBot to tell a story about helping animals find their way home. By coding MatataBot to navigate through different obstacles, children can design paths that lead to each animal. This encourages empathy and creativity, as kids can come up with unique ways to guide the robot while understanding the basics of coding.

Benefits of Digital Storytelling with MatataStudio

  • Develops Logical Thinking: Writing code to create a digital story teaches children to think logically. They must decide which coding blocks to use, in what order, and how each action will affect the overall narrative. This process helps them understand cause and effect, sequence, and logical problem-solving.
  • Promotes Communication: When children work together to create a story, they learn to communicate their ideas, listen to others, and collaborate to solve problems. It becomes a fun team-building activity where kids learn to share and build on each other’s creativity.
  • Encourages Experimentation: One of the best parts of coding with MatataStudio is that it allows children to experiment freely. They can try out different story ideas, change the actions of MatataBot, and see what works best. This trial-and-error approach helps them learn from their mistakes and feel more confident about experimenting with new ideas.

MatataStudio and MatataBot open up a world of possibilities for children to explore digital storytelling through coding. By combining the logic of programming with the creativity of storytelling, children can create interactive stories that are fun, educational, and highly engaging.

Contact us

Fill in your details below or send us an email on info@knowledge-hub.com

Introducing Interactive Learning with the LEGO® Education Coding Express Set

Introducing Interactive Learning with the LEGO® Education Coding Express Set

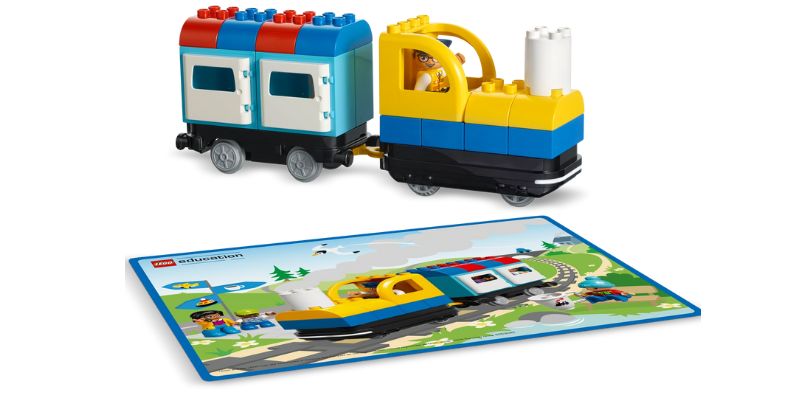
Welcome to the world of Coding Express, a fun and engaging way for Pre-K and Kindergarten students to explore important concepts like traffic rules and problem-solving. Using interactive learning & play, the Coding Express set, notably in Lesson 7 titled Journey: Trouble on the Road, teaches young learners the fundamentals of coding ideas and helps them comprehend how “traffic signs” operate. In addition to having fun designing tracks, the main goal of this lesson is to teach kids the value of traffic signs and regulations in assisting with potential roadside issues.

This interactive learning unit is designed for students aged 4-6 and typically lasts 30-45 minutes. It is an advanced lesson but is easily adaptable based on the needs of your students. The Coding Express app is key to making this lesson dynamic, but an unplugged version can also be used if you prefer to skip the technology aspect.

Engage – Introducing Traffic Rules

Introduce the lesson by having a discussion about driving rules with the students. Ask open-ended questions such as:

  • Do you know any traffic rules? What are they?
  • Why is it necessary to follow traffic rules?

This conversation will help the students start thinking about the importance of following rules and how traffic signs help us stay safe on the road. Then, introduce the idea that traffic signs are visual reminders of these rules, guiding drivers to avoid danger and make the roads safer for everyone.

For added fun, turn the classroom into a mini driving arena! Using the four traffic signs included in the Coding Express set (stop, animal ahead, construction work ahead, & railway crossing), have students guess what each sign means. You can place the signs around the classroom and ask the students to pretend they’re driving high-speed trains. When they approach a sign, they must ‘slow down’ or ‘stop’ based on the rules they’ve just learned. This playful activity gets them moving and thinking about how traffic signs function.

Building and Problem-Solving with LEGO® Education 

Now it’s time for the students to get hands-on with interactive learning! In this phase, students will form small groups to build a Y-shaped track using the Coding Express set by LEGO® Education. Once the track is built, they can place their models, representing buildings or stations, around the track. This adds a layer of imagination and storytelling to the lesson, as students start envisioning a real-world journey.

Randomly place action bricks along the track. These bricks introduce specific actions or problems for the train, such as stopping, changing direction, or slowing down. Using the Coding Express app by LEGO® Education, students will take turns driving their train on the track, using different buttons to see what happens when the train passes each action brick.

This part of the lesson encourages experimentation. As students explore the various functions of the app, they will encounter problems like traffic jams or wrong turns, giving them the opportunity to solve these issues using traffic signs they’ve already learned about.

Finding Solutions

Now that the students have seen how their trains move and respond to different situations, it’s time to reflect on what they’ve learned. Engage into a discussion by asking:

  • What happened when the train passed each action brick?
  • Which traffic sign would help solve the problem you faced?

Encourage the students to think critically about the scenarios they’ve encountered during the interactive learning phase. This step helps solidify the connection between traffic signs and solving real-life traffic problems.

Elaborate – Creating and Playing with Traffic Signs

Invite them to invent their own traffic signs or models, imagining new ways to keep drivers safe. These creations can be placed around the track, and students can explain why they made each sign and how it contributes to road safety.

This is also an opportunity to discuss other traffic safety measures. Ask questions like:

  • Can you think of any other important things to keep in mind when driving?
  • What are other ways people stay safe on the road?

Evaluate – Observing Student Progress

The final phase is all about evaluation. As students work through the lesson, teachers can observe their progress using an observation checklist:

  • Did the students successfully create the Y-shaped track?
  • Were they able to describe the journey their train took?
  • Did they demonstrate an understanding of the sequence of events on their trip?

Encourage students to explain their thinking and decision-making processes throughout the interactive learning activity. This gives insight into their understanding of traffic signs, road safety, and basic coding concepts.

Contact us

Fill in your details below or send us an email on info@knowledge-hub.com